How to Bypass Google Account (FRP) On MOTOROLA XT1021 Moto E
March 27, 2021
What is FRP/Factory Reset Protection
Factory Reset Protection (FRP) also known as Activation Lock is a security feature to protect your Android device from unauthorized access. This was introduced on android devices with android version 5.1 and higher. FRP is automatically activated when you set up a google account on your device. Once FRP is activated, it prevents use of a device after factory data reset(hard reset) unless you login with the same google account or gmail account.
Bypass Google Account (FRP) On Motorola XT1021 Moto E

Requirement Needed For Motorola XT1021 Moto E FRP Bypass
- Frp Bypass application.
- Google Account Manager application.
Steps To Bypass Motorola XT1021 Moto E FRP
1. First tap start then connect the Motorola XT1021 Moto E to a WIFI hotspot or data
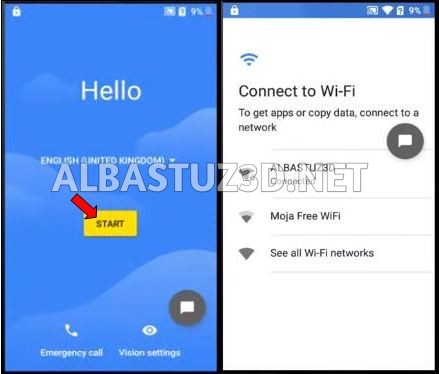
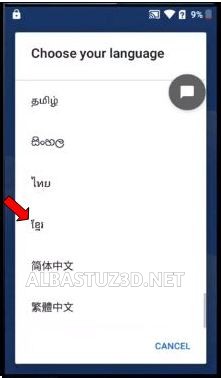
2. Now after connecting your internet , go back to the start and change the language as shown in the picture below.(Don’t worry, changing the language will enable you to have more keyboard option and also have the access to change the keyboard language settings).
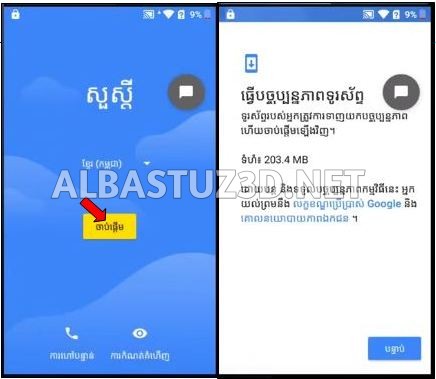
3. After changing the language, click the blue option(next) to proceed to the page as shown in the picture below.
4. Now tap the back option to return to “connect to Wi-Fi” then tap the last option(See all Wi-Fi networks).
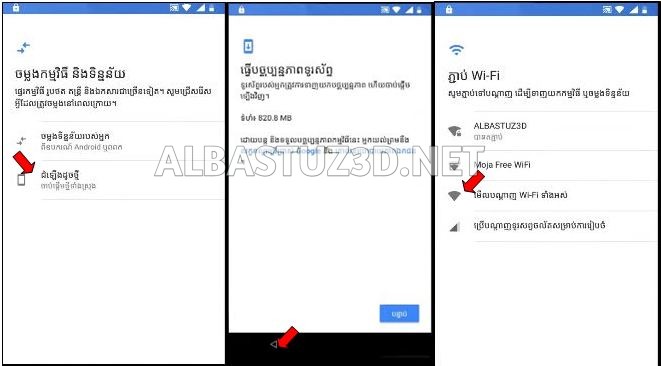
5. Next tap the “+”icon(add network).
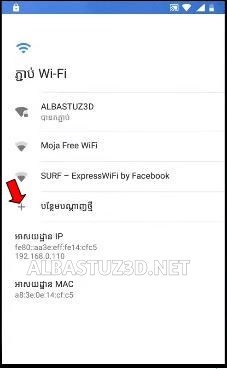
6.You will be brought to pop up keyboard with the selected language. Long press the “world “icon just next to space key as shown on the picture below.
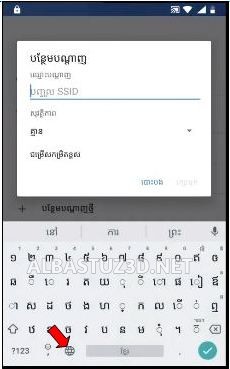
7.Tap the last option just below the keyboard option then tap again the last blue option(below QWERTY).
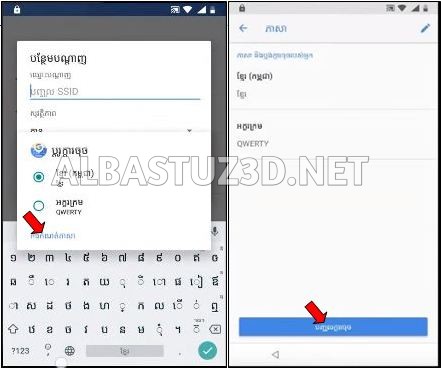
8. You will be brought to the options as shown in the picture below. Select the second option (black in color with brackets).
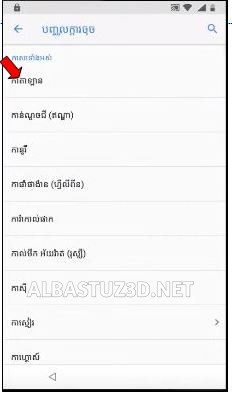
9. You will see a one or two keyboard loading. Click on the 3 dots at the edge.
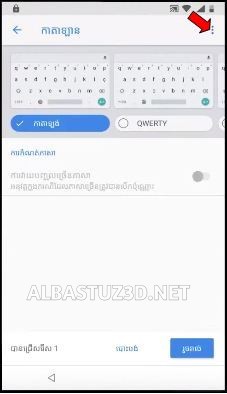
10. Select Help & feedback(second option), then click on the first articles (about Switch Access for Android).
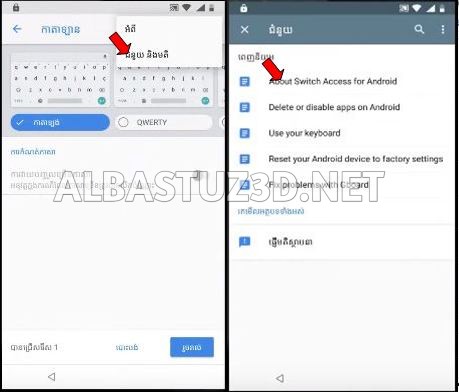
11. After the page is loaded, scroll down until you see “set up Switch Access your Android device “and click it.
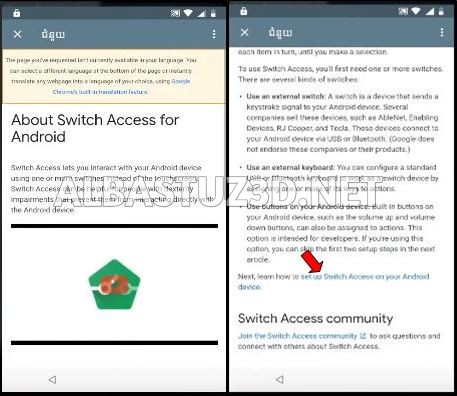
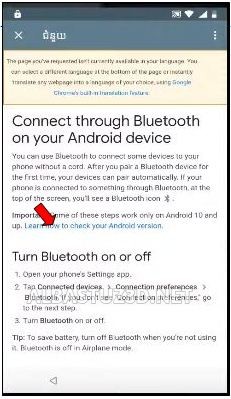
12. Wait for the page to load and scroll down until you see “connecting to Bluetooth devices “as shown in the picture below.
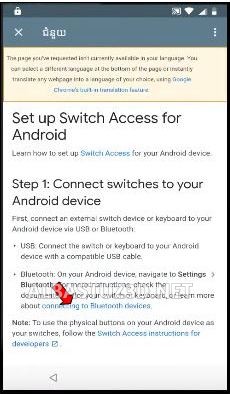
13. Again wait for the page to load then scroll and tap” Learn how check your Android version” see the image below.
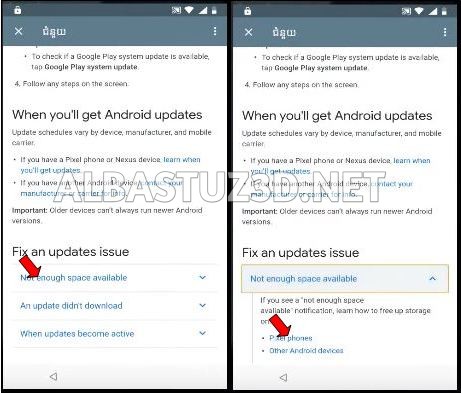
14. After the page is loaded, scroll down and tap “Not enough space available”. Under the option tap “Pixel phones”.
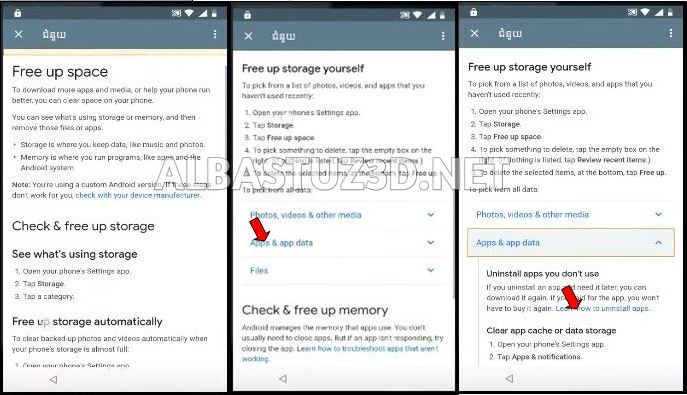
15. Again, wait for the page to load, scroll and tap “Apps & app data” then under it click “Learn how to uninstall apps”.
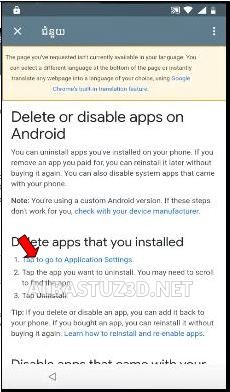
16. After the page is loaded, scroll and click “Tap to go to Application settings”.
17. This will now give you access to chrome, now setup your chrome for browsing.
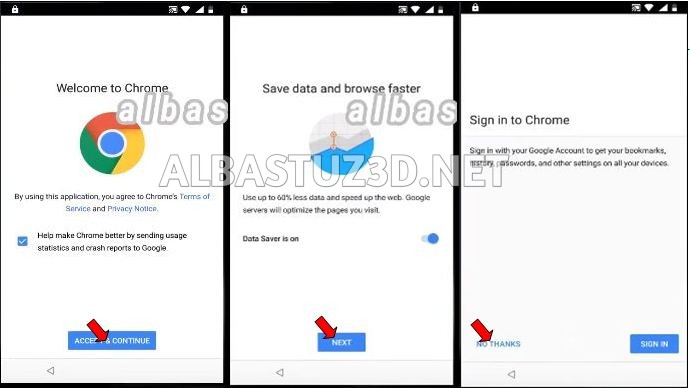
18. You need to change the keyboard language to understand better what you are typing so long press “world “icon just next to space key and change it to QWERTY or just tap it.
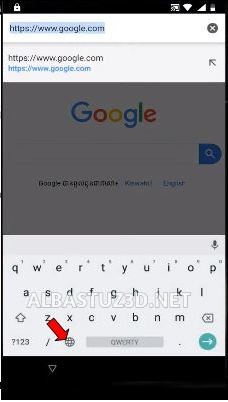
19. In the search or web address bar type in “https://albastuz3d.net/” and wait for the download page to open.
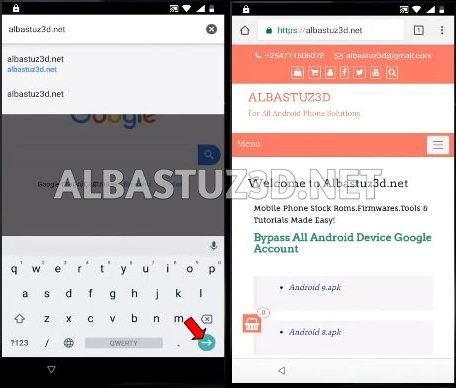
20. Download the required files:
21. Check the download progress by clicking on the 3 dots at the edge of Chrome browser then click on download.
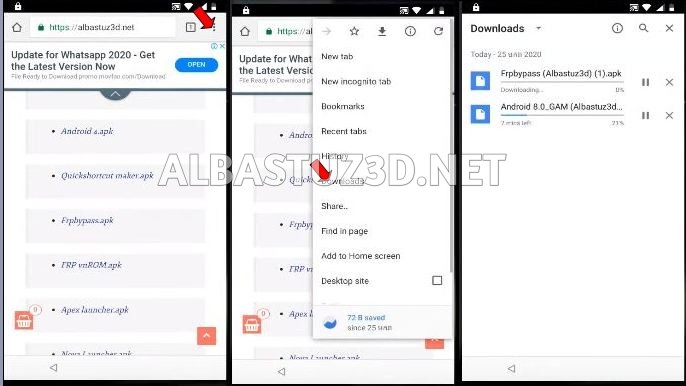
22. After successful downloading of the 2 files, firstly install Google Account Manager application click done after installing.
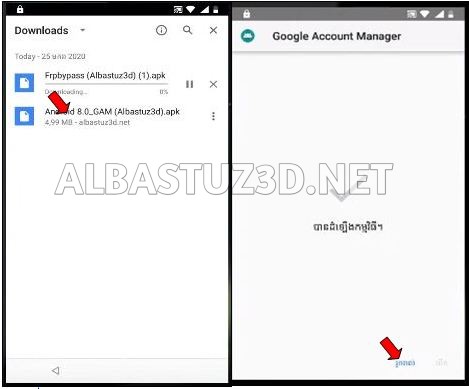
23. Install FRP Bypass application and open it.
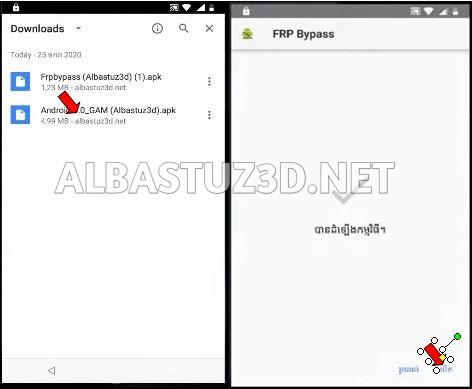
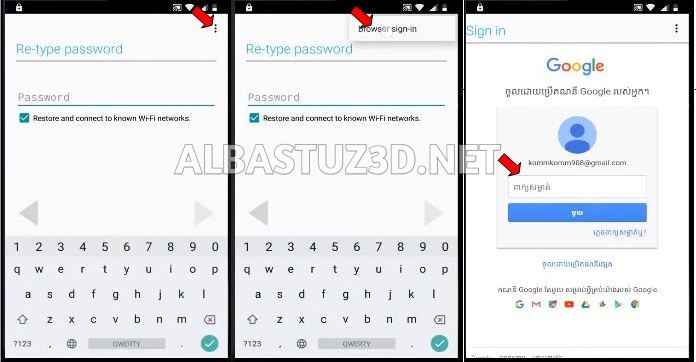
24. Click on the 3 dots at the edge, select Browser sign-in then type in your working email and click next followed by your password.
25. Wait for some seconds till its sign in and automatically close the sign in page then Restart the Phone.
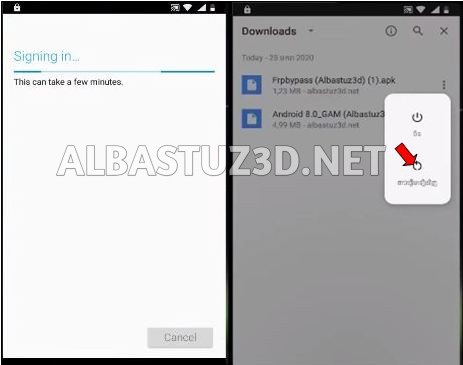
After restarting do the necessary setup and the FRP will be bypassed.
That is all about how to bypass the FRP, I hope you understand the above explanation better and if not watch this video below for better understanding, please don’t agitate to leave a comment below if any question or any feedback.
Also subscribe to our YouTube channel.